

Installing infrared cameras is an indispensable selection criterion, especially for families, companies, and factories for night surveillance. Infrared CCTV is a camera feature that allows night vision in low light conditions. The more powerful the infrared surveillance camera, the farther the night vision and the higher the cost of the camera. Immediately refer to the following article of P69 Joint Stock Company for more technical instructions for installing infrared cameras.
What is an infrared camera?
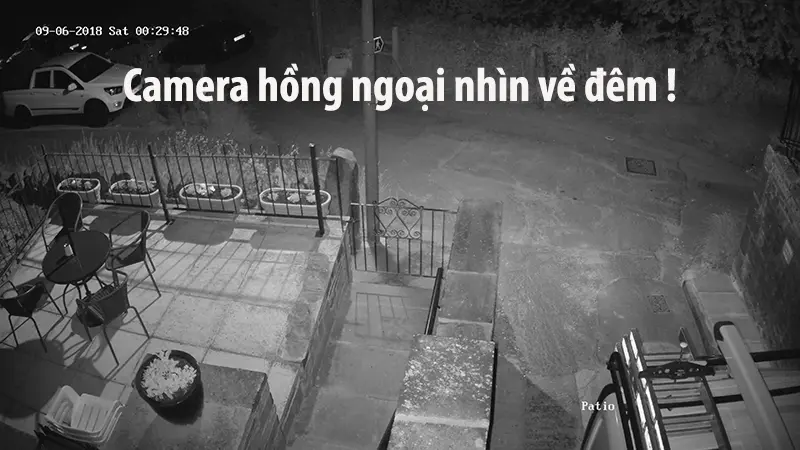
Infrared camera is called IR Camera (Infra-red Camera), it is attached with infrared light and works by light sensor. During the day, they are like a normal camera. When the light changes, the light sensor will change accordingly. Infrared light will work based on light sensor. Automatically turns on recording in dark areas and may appear as black and white. The night vision infrared camera’s vision mode is extremely effective.
How does the infrared night camera work in such environmental conditions?
First of all, we have to mention infrared rays. Infrared is a beam of electromagnetic radiation with a wavelength longer than light and shorter than microwave radiation. Of all the colors of light, red has the longest wavelength. This electron beam is longer than red light, so it is called infrared.
We cannot see this light with the naked eye. Must use modern technological equipment to be able to detect. It is the characteristics of infrared that the inventors have designed the camera to see night in the absence of light. It is similar to how we see the dark night.

Benefits of installing infrared cameras
Installing infrared cameras in homes and offices will bring many other benefits such as:
- Illumination from an infrared camera can surpass what the naked eye cannot see. Therefore, in the evening, even though there is no light, the camera still records clear and accurate images.
- The images obtained from the infrared camera are always realistic and high resolution.
- The infrared camera uses infrared LEDs, so it saves up to 20% of energy, while other functions still work normally.
- LED lights used in infrared cameras have a longer service life than using incandescent lights in conventional cameras. A camera equipped with LED lights can last up to 1,000,000 hours.
- Infrared cameras are suitable for both indoor and outdoor camera installation.
- The dome of the infrared camera is made of Polycarbonate that can withstand strong impacts, so even if it is vandalized by crooks, the device will still work normally.
- Compared to conventional cameras, infrared cameras are easier to install. At the same time, quick installation does not take much time and effort.
- In case of installing a backlit infrared camera, the image obtained is still true, not glare like other conventional cameras.
What you need to know when learning how to install an infrared camera
The concept of how to install infrared cameras is not simply the construction and installation of the camera. Depending on the purpose & object of use (such as you are a home user, office, agency, factory, factory, school, hospital, hotel, resort, restaurant… or shop, shop, restaurant, cafe) but how to install the camera yourself will vary according to the design and construction of the camera will be very different.
So, unless you’re just attaching 1-2 cameras and don’t need a recorder, no need to set up the system, the category of “camera installation instructions” needs to be understood more broadly. It includes the following stages:
- 1. Survey, equipment selection (*): Survey to choose which type of camera, recorder, hard drive, monitor is suitable for each customer’s needs.
- 2. Design of the technical plan (*): diagram or connection model of the camera system; Choose a wireless or wired connection system; How to set up technical configuration on recorder, camera, control software. The position of each camera, the location of the recorder, the screen, the location and the distance of the length of the cord are appropriate or not.. (including signal and power cords).
- 3. Deployment and construction work: are the stages in favor of construction instructions, and instructions on how to install the camera system. (This is the main content of this article).

Things need to know when installing an infrared camera
The article on how to install a full infrared camera is intended to help newcomers install a complete camera system at home, office or shop for security monitoring.
Step 1: Prepare. Including the preparation of equipment, preparation of construction materials and tools and tools during the construction process.
To be able to know how to install any camera system yourself, preparation is extremely important. The preparation before installation will help you have the necessary plans as well as the backup plans before going to the construction site.
Prepare the main camera equipment
- Camera: Choose the type of camera suitable for the purpose of use, choose the right focal length, angle, distance, infrared distance, resolution, IP camera standard or analog camera.
- Recorder: suitable for the standard camera in use and has the number of cameras at least equal to the number of cameras in the system.
- Hard drive (HDD): suitable for the time it takes to store, we recommend you to choose the Seagate Skyhawk hard drive series (with 3 times the performance of a regular computer hard drive).
- TV screen: It is recommended to choose a monitor that supports HDMI because most new recorders support HDMI connection to LCD TV screens. Or you can use a laptop monitor with an HDMI port.
Prepare auxiliary materials
- Power supply (adaptor) for the camera.
- Power supply (adaptor) for the recorder.
- Mouse (mouse).
- 12V power cord.
- Signal cable.
- HDMI cable (or VGA cable).
- Connector Jacks.
- Knot rope (plastic strip).
- Electrical tape.
- Gaskets & screws.
- Electrical brace & double-sided tape.
Prepare tools & devices
- Cable clamp pliers.
- Cutting pliers and regular pliers.
- Concrete drill, drill bit and hammer.
- Bakery screwdriver.
- A word ladder.
Step 2: Check & test the system. Run a test to make sure the system is fine before construction.
The purpose of this step is to ensure that the camera system is in good working condition. Of course, this is also to limit risks such as camera failure, recorder & hard drive failure, screen error, cable error… and control software errors on the recorder.
Connect signal wire
- Prepare many short signal wires: you prepare test wires with a length of about 0.5m to prepare to connect all cameras to the recorder. As many cameras, as many test lines.
- Press 02 jacks (jack BNC or RJ45)
- Connect all cameras to the recorder, prepare to test the camera system.
Connect the recorder to the monitor
- Attach the hard drive to the recorder.
- Connect the mouse to the USB port of the recorder.
- Connect the HDMI cable between the recorder and the TV/LCD monitor. In this step you need 01 monitor to check the camera image signal.
Final inspection before construction
- Plug in the power for the cameras to work in turn. You can check if the camera has power or not by covering the camera’s eyes with your hand (simulating darkness). If the infrared light in the camera turns on then the camera is powered on.
- Plug in the power to the recorder & monitor. Note: the recorder often emits many continuous beeps when the hard drive is loose (check the power cord and signal wire of the hard drive before powering the recorder).
=> Check the image: you look at the signal on the screen to make sure the cameras transmit the signal for the image to be clear, without noise, or grainy.

Step 3: Fix the camera, recorder and monitor in place
First, you will proceed to disassemble the parts inside the camera before proceeding to fix it on the ceiling or on the wall.
To do this, you need to understand through the structure of some common cameras to know how to remove & assemble the camera housing.
There are two basic types of cameras:
- Dome camera: also known as spherical camera, often used indoors.
- Bullet camera: also known as body camera, often used outdoors.
Step 4: Go signal wiring & power cord.
Take signal wiring & power cord.
Step 5: Connect the signal cables and the jack power.
Connect the signal cables and the jack power.
Step 6: Operate the system & make a final check.
System operation & final inspection.
Step 7: Fix all cables & collect garbage.
Fix all cables & collect garbage.
Step 8: How to install the camera to view the camera over the internet without a domain name.
How to install a camera view recorder over the internet without a domain name.
Step 9: How to install the phone software to view the camera remotely.
Also you can refer to: Experience in installing outdoor cameras
Reputable infrared camera installation unit
There are many infrared cameras on the market today. However, we would like to introduce to you a leading reputable unit in the installation of electricity, light electricity. That is P69 Mechanical Factory. P69 is always appreciated by people for the following reasons:
– Factory scale, using modern equipment. International standard.
– Professional and experienced team of engineers and technicians
– 24/7 free support consultation
– Free shipping and installation
Contact us today for a free consultation and answer at:
Contact information P69 – M&E Contractor
Address: No. 6/165C Xuan Thuy, Cau Giay District, Hanoi
Website: https://p69.com.vn/
Hotline : 02437688156 – 0965937799
Email: kd@cokhip69.com.vn
Facebook: https://www.facebook.com/p69nhathaucodien
LinkedIn: https://www.linkedin.com/in/congtyp69/
Youtube : https://www.youtube.com/channel/UCOUwCnE5iGj8iqe_ZIUM7oA