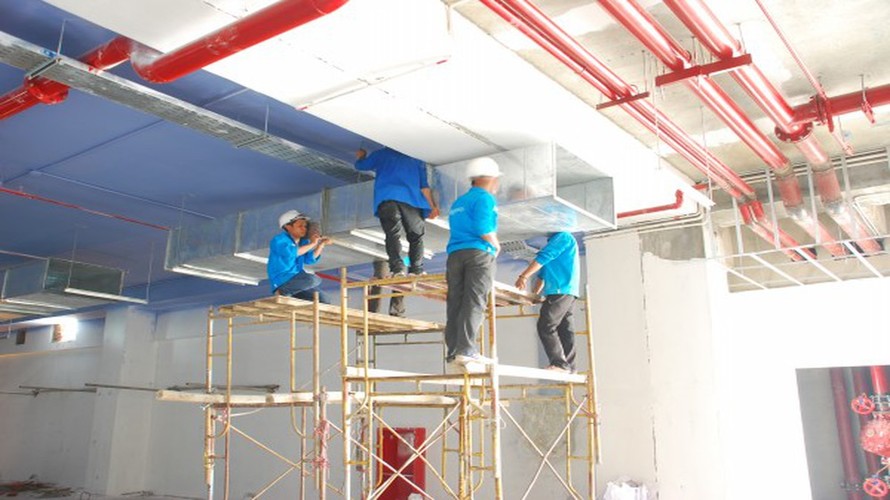
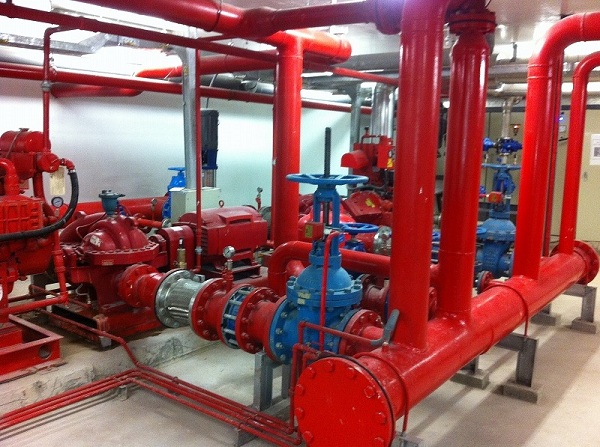
Technical construction and installation of fire-fighting pipelines includes the following methods. P69 company will send you the solution and instructions for the construction and installation of fire-fighting pipelines to the highest standards and to ensure the highest safety. Please refer to the article below.
Tools for construction and installation of fire-fighting pipelines
- Electric drill
- Clean cloths and carpets
- Powersaw
- Wet cloth
- Disc cutter
- Tape measure
- Hand saw
- Measure
- Big square head
- Arc Welding Machine
- Metal broom
- Oil brush

- Vinyl sheet
- Soldering iron, nail, grinder, bolt, temporary nut
- Fire extinguisher
- Goggles
- Windshield, pressure vessel, wire and connector, pulley
- Scaffolding, forklifts
- Hammer, Cle, Alkaline, plumb line…..
The team carrying out the transportation of fire hoses and accessories must not be bumped, scratched manually or use a winch, forklift, or hoist to lift the installation hose to the installation locations. In particular, there must be a bracket to place the pipe supplies, avoid placing them directly on the floor.
Detailed construction and installation instructions for fire fighting pipes
The construction and installation of fire protection systems must follow a thorough and strict process from the process of design, appraisal, approval, construction, acceptance, inspection to maintenance of the fire protection system. Understanding the construction and installation methods of fire fighting pipes helps to ensure the operation of fire fighting pipes more effectively and optimally. Measures for construction and installation of fire-fighting pipelines include:
1. Pipeline processing before installation
– Before installing the pipe must be cleaned of rust and impurities with a rust brush
– Use a rag to wipe off the preservative oil both inside and outside the tube
– Paint to protect and preserve black and galvanized steel pipes
– Each piping system will be thoroughly cleaned before connecting to the system and equipment. For carbon steel pipe, fill the tube with water after completing the tube leak proof test or cleaning to prevent corrosion.
– Carefully inspect the pipe and the pipe connection.
– The pipe will be cut with a cutter. Metal wheel cutters are not accepted.
– Edges inside and outside the pipe that are rough or sharp will be smoothed. The inner edges must be flat.
– When not constructing pipes, fittings and terminal valves, they should be temporarily covered to avoid external influences
a, Conventional painting method, using anti-rust coating and finishing paint

– Technical features:
- Good anti-rust, good adhesion for the next coating.
- The amount of paint consumed for 1 m2 of product: 100 – 150g ( actually depends on the surface to be painted).
– Using:
- Surface preparation of the treated surface should be free of dirt, grease and any other impurities. Clean the oil on the pipe surface by 2 methods: Use gasoline and dry rag to clean the oil on the pipe.
- Scaly, rusty: sandpaper, stiff brush.
- Prepared metal surfaces must be painted immediately to prevent re-corrosion.
– Machining method
- The paint bucket must be stirred well.
- Use brush, roller or spray gun (supply pressure: 2 – 4 KG/cm2).
- Solid paint with solvent DMT2 – AK; mixing ratio: 5 – 10 %.
- Time allowed to apply the next layer, minimum: 22 hours.
- Paint condition: air humidity not more than 90%.
b, Multi-component paint method – special paint
– Technical features:
- Use to display color on pipes.
- Good surface protection, good corrosion resistance.
- The amount of paint consumed for 1m2 of product: 150-200g (actually depends on the surface of the material to be painted).
– Using:
- Surface preparation to be painted: New material surface: S.AK-N1 anti-rust paint (for black steel pipes) or CXL-WP surface treatment paint (for galvanized steel pipes) dry, clean, dry, free from grease and dirt.
– Processing method:
- The paint bucket must be stirred well.
- Use brush, roller or spray gun (supply pressure: 2 – 4 KG/cm2).
- Solid paint with solvent DMT2-AK; mixing ratio: 5-10 %.
- Minimum 2 coats required. Each class is spaced 1 hour apart.
- Paint condition: air humidity not more than 90%.
2. Measures for construction and installation of fire-fighting pipes
- The cutting method is carried out in accordance with each type of material and the cuts are exactly as shown in the drawings.
- Using a specialized cutter to ensure the length of the pipe, the cuts according to the requirements.
- Using eye protection, the cutter ensures that there is a guard to prevent chips and fire from being thrown out causing an accident.
a, Cut
- When cutting does not deform the tube and the guard, the pipe cross-section must be smooth and perpendicular to the center of the pipe (or bevel if necessary) in order to make a joint.
- Pipe cutting tools must be suitable and ensure the required cutting length.
b, Pipe thread:

Pipe thread details from 25A-50A
– Straighten the pipe and clean the Bavia before threading
– For pipes with diameter D<= 50, the minimum thread length reaches 20-25mm
– Thread pipe by threading machine with thread pitch and specified length. Threads on tapered pipes, complying with pipe thread standards
– Thread the pipe using a threading machine with an automatic sizing device. Cut perpendicular to the center of the pipe, cut gradually and evenly so that the cutting layer is smooth. Depending on the type of pipe, proceed to give the appropriate amount of cutting oil, or evenly distribute it to the cutting unit. When the oil changes color, it needs to be replaced with new oil. When the tooth is defective, it must be replaced with a new Taro blade.
c, Pipe connection
– Pipe connection by welding for pipes >=D65
– Fabrication of pipe sections is carried out according to the following steps:
Step 1: Cut the tube.
+ Step 2: Bevel the edge of the pipe.
+ Step 3: Check pipe cleaning
+ Step 4: Pipe connector
+ Step 5: Install in the right position
+ Step 6: Mounting, adjusting
+ Step 7: Fixed welding
+ Step 8: Repair
+ Step 9: Try pressure
– To connect the pipe together or connect the pipe to the device, first check the position where the device needs to be connected.
Using a lifting device, put the two pipes into position, at the right design coordinates, the two ends of the pipe are close together, concentric with each other and parallel to the horizontal, with a gap of 1.5-3mm.
– Two temporary pipes are ashed with steel cables or hoists or supported by racks, using a device to adjust the concentricity and clearance between them.
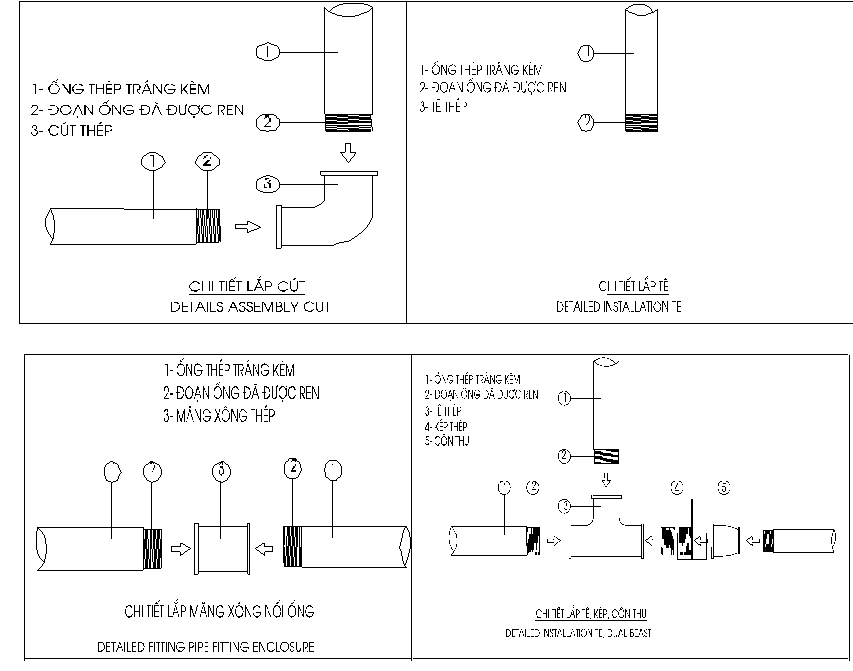
d, Connection by thread
Thread connection according to the usual scheme
– Threaded connection to galvanized steel pipe with nominal diameter DN<=50
– Threaded connection is mainly done at the construction site in steps

When installing pipes, it is necessary to check and clean cutting oil, water, dust attached to the thread, inside the pipe or the pipe cross-section. When threading, wind the jute wire in the direction of the thread and then apply a sufficient amount of paint to cover the surface. When screwing, twist the thread by hand and then tighten the pipe with pliers. After connecting the thread, use paint to cover the remaining threads and red paint to finish the pipe
Thread connection according to the option of using epoxy glue (applicable to areas where the ceiling is not closed)
– Connection by threading for galvanized steel pipes with nominal diameter DN<=50 with A&B glue mixture according to the sequence
– Before connecting pipes, mix glue A, glue B and solvent type
AB glue (Expoxy glue) is a synthetic chemical used in the processing industry, especially the wood, stone, concrete, metal processing industry.
– Glue A (Epoxy) is clear, glue B (curing agent) is honey yellow
– Mix in the ratio 1:1 and stir until the color is uniform
– The time to ensure the glue mixture after mixing is 1 hour
– Apply the glue mixture that has been mixed on the surface of the accessory and the threaded pipe of the object to be bonded, wait for it to dry and use the joint.
– Specify the thread pitch corresponding to each pipe size. Thread lathe table and tool compliant with JIS B0203 . Standard
e, Solder connection
Scope of application
For pipes with a diameter of more than 65mm, the welding method is used to connect the pipe
The welding process is as follows

+ Preparation, welding rods, welding machines, pipe materials. Measure the size of the tube and clean the surface of the tube. The surface will be free of oil, dirt and dry (100mm from the weld). Clean the edge with a grinder, iron brush
+ Check the angle of inclination matches the thickness of the pipe. If the angle of inclination is not correct, correct it with a file. Adjust the tube so that the center is on a line
+ All pipe welding will be done by arc welding process. The electrode will be selected by the mechanical engineer to match the approved electrode.
+ The number of welding dots for pipe sizes equal to or less than 300A is 3 points, for pipe sizes
350A-500A will be 6 points and for pipe sizes equal to or above 550A it will be 8 points.
+ Conduct welding
+ Conduct filling welding
+ Roll the tube from top to bottom. For pipe clamps, welding will be done from bottom to top
+ After welding, all welding areas will be cleaned. The soldering point must be free from rust.
All welded pipes must be visually inspected. Damaged welds refer to section 5.4.4.
+ The width of the finished weld shall not exceed 3.2mm of the main groove weld.
+ Report to the engineer about the damage. Damaged welds and pipes must not be repaired
250mm will be cut square and right, and the above welding will be done to join the pipe again.
+ After welding and cleaning, paint anti-corrosion with approved paint.
Welding sequence
- For the base material is steel (black steel pipe, galvanized steel)
+ For materials with a thickness of more than 4.5mm, two layers must be welded, the lining is fully welded around the pipe before welding the coating.
+ For pipes with a thickness of less than 4.5mm, it is allowed to weld once, fill in the weld gap. The weld requirement must be filled, the weld height must be higher than the outside of the pipe but up to 3mm
+ Maximum internal convexity 1mm
+ For flange welds, the weld dot will be 1 point and the flange will be the right angle to the pipeline axis. Then the number of solder points is 3-4 points before the official welding. Welds on the outside are not outside the flange.
- Supplies and welding machines.
When the contractor hires the welding machine, the contractor will pass a quality check under the supervision and approval of the engineer before being allowed to weld.
Do not use a hammer to drive into the pipe. Do not leave the soldering iron in a wet area.
- Safe
+ The welding area must be covered with vinyl sheet to avoid water and dust.
+ Fire extinguishers will be equipped at the welding area and must be checked for safety.
+ For worker’s safety, ground wire must be equipped for arc welding process; and distributes clothing, goggles, and gloves to workers.
+ Do not conduct welding without the contractor’s own supervision.
+ Welding will not be performed when the quality of the weld is impaired due to windy weather conditions including sand blowing or strong wind (wind speed above 10m/s). Equip windbreaks and tents when welding in the above weather conditions.
Flange joint
– Some locations cannot apply welding method or for convenience in disassembly, flange joints will be applied. For example, the position of the installation connection with the locking valve above 65mm and the connection position with the HDPE pipe when exiting the building

– Steps to weld flange with pipe
+ Put the piece of pipe that needs to be flanged on the support, insert the flange into the end of the pipe
+ Using a ruler perpendicular to the body of the pipe and the flange, align the gap between the pipe and the flange so that the gap is even.
+ Weld 1 point between pipe and flange, align right angle and clearance again, then symmetric spot weld
+ Clean the welding slag from the welding points and then make a complete weld
– Flange jointing steps
+ Align joints with flanges
+ Align the holes between the straight flange, put the rubber gasket in the slot between the two flanges so that the rubber seal is exactly on the two edges of the flange.
+ Install the bolts, bolts and nuts, tighten the bolts in the order as shown below. When installing flange connection bolts, technical measures should be taken
+ Torque is adjusted attached to the washer torque. Check the washer torque.
+ Tighten the bolts evenly
+ Use a marker to mark the tightening bolt and nut when finished, then tighten it again and check it visually.
Some technical measures need to be met as follows:
+ Torque will be adjusted attached to the torque of the washer. Check the torque of the washers.
+ Tighten bolts evenly. The order of tightening is as shown in the picture
+ Use an oil marker to mark the tightening bolts and nuts when finished. Then tighten again and check visually.

Connect by quick coupler
– Apply to technical area – water supply pump room
Typical details of system connection by Victualic-Brand . quick coupling
– Use accessories and specialized processing machines of the manufacturer
– Pipe connection process
+ Using a grooving machine, create a groove (Groove) on the two ends of the pipe
+ Use washers/gaskets to hug the two ends of the pipe
+ Attach the semicircular Housings to the concave groove to hold the Gasket and keep the stiffness of the joint. Use bolts and nuts to tighten the 2 panels.
Contact us today for a free consultation and answer at:
Contact information P69 – M&E . M&E Contractor
Address: No. 6/165C Xuan Thuy, Cau Giay District, Hanoi
Website: https://p69.com.vn/
Hotline: 02437688156 – 0965937799
Email: kd@cokhip69.com.vn
Facebook: https://www.facebook.com/p69nhathaucodien
LinkedIn: https://www.linkedin.com/in/congtyp69/
Youtube : https://www.youtube.com/channel/UCOUwCnE5iGj8iqe_ZIUM7oA

